Streamline User Registration Process of Your App By Featuring Facebook Login Popup

Today, the entire world is ruled by apps. Nearly all companies shift to building an app for their business. However, often it is seen that the user base trying to access the app have a greater probability to quit owing to the unnecessary registration process. Not only it costs time but loops towards unwanted data being fed to the system.
Easing this scenario, today’s app developers have streamlined the process with all you need to do it’s use your Facebook is to sign up. Fascinating right?
A simple click followed by approval and there you are logged into the app.
Whoa!
Current social media trends oscillate around users and people across the globe are online sometime throughout the day. It goes without saying that nearly the entire population have access to the social media and the account follows.
In the event of above, an addition of Facebook login in your app would leverage the rate of registration in your app in a day. And astonishingly, it could double the total app registration anticipated by you. Sounds good?
Having said all the above, it’s time to delve into the technical part of our topic. Here, we would learn to integrate an option that suggests Facebook login for your Android app.
Multiple applications these days use Login With Facebook as an alternative to registering users in their applications. To turn the feature of Login with Facebook live, we must have a unique ID for our Android app that enables communication with the Facebook server. You can easily create one by visiting http://developers.facebook.com/
Next, all you need to do is copy paste the code snippet have provided here.
Let’s see how Featuring Facebook Login Popup process flows:-
We start with creating a new project at the Android Studio to start with building an app.
Create a new project in android studio =>File=>New=>New Project

Before heading towards the code snippet, you need to have your application registered.
Register your facebook application using your Facebook account to https://developers.facebook.com/apps/.

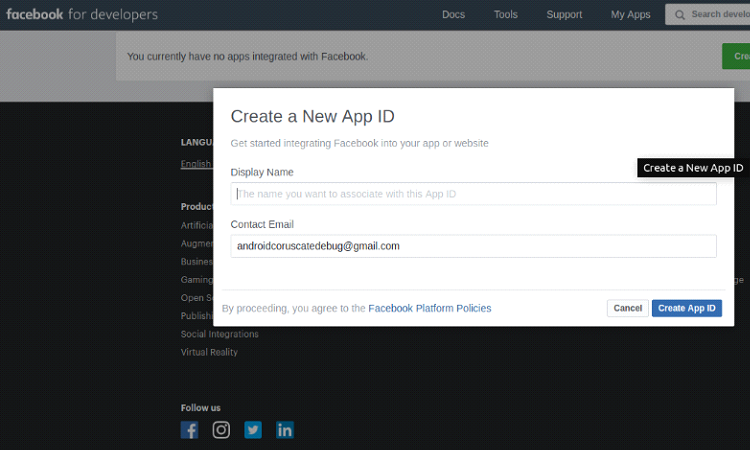
Next, you need to create your App. Follow the steps shown in the figure below to go ahead with building an app.
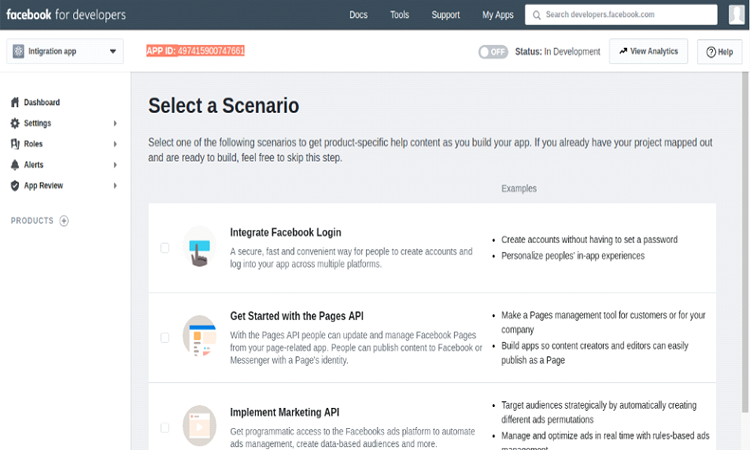
Hence we set the app name to Facebook integration app. We’ll need to set up the same name in the string.xml app_id string of our Android Studio Project.
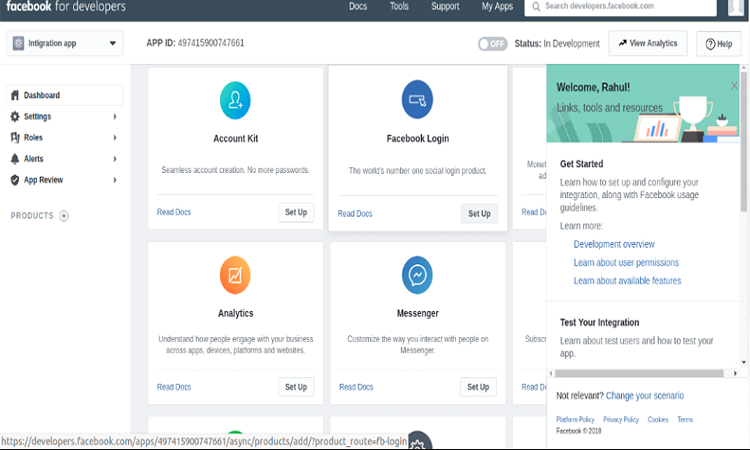
Next, you need to choose the option of Facebook login setup and choose the platform of your choice on which you are to deploy the app. Since we are concerned about Android, select the same to move forward.
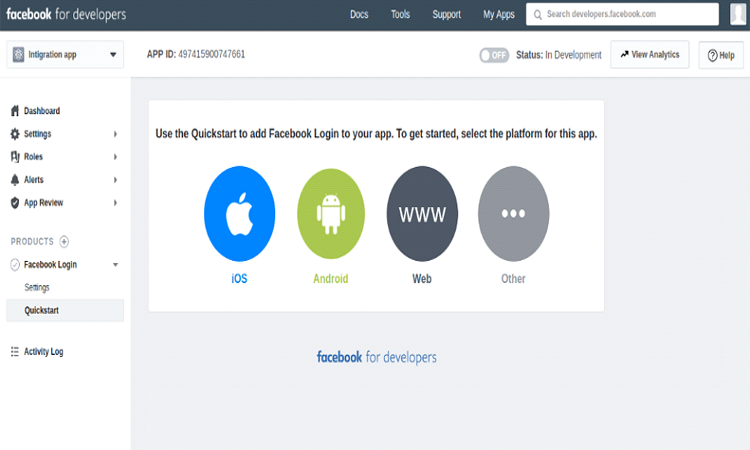
Here is where the code comes into the picture. Open the Gradle file of your app and add the given below snippet.
• Add the following dependencies in your app’s build.gradle file.
buildscript {
repositories {
mavenCentral()
}
}
• Add latest version of the SDK dependency.
implementation ‘com.facebook.android:facebook-android-sdk:[4,5]’
• Check whether SDK is successfully added into your project.
Add the following import statements in your MainActivity.java class file as shown below. If there’s does not occur any error, the build has been successful.
import com.facebook.FacebookSdk;
• Add your Facebook App ID
Next, add the App ID in a string.xml file in your Android Studio Project as the same appears in the dashboard of Facebook developers application.
497415900747661
• Add package name and Facebook Login activity in below image

Add Your Development and Release Key Hashes
Mac OS
In order to generate the development key hash, you need to open a terminal window and run the following command:
keytool -exportcert -alias androiddebugkey -keystore ~/.android/debug.keystore | openssl sha1 -binary | openssl base64
Windows
Next, to generate the generated development key hash, you need to run the following command in a command prompt in the Java SDK folder:
keytool -exportcert -alias androiddebugkey -keystore
“C:\Users\USERNAME\.android\debug.keystore” |
“PATH_TO_OPENSSL_LIBRARY\bin\openssl” sha1 -binary |
“PATH_TO_OPENSSL_LIBRARY\bin\openssl” base64
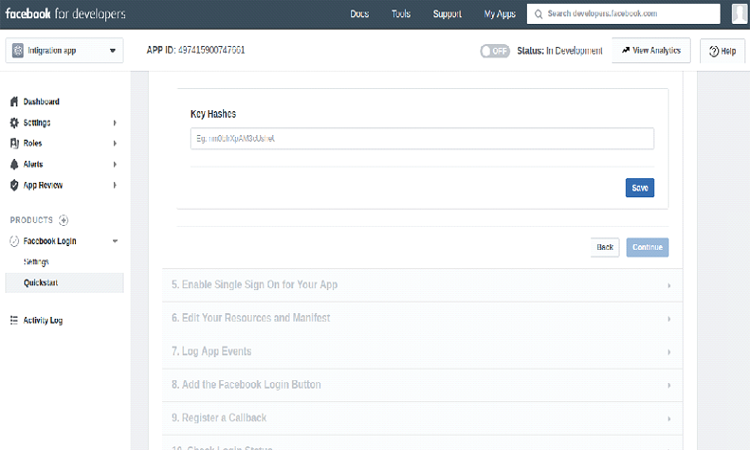
Enable internet permissions in the AndroidManifest.xml file by adding the following lines in the manifest element.
<uses-permission android:name=”android.permission.INTERNET”/>
Now move on to add the following code inside the application tag in the Manifest.
meta-data android:name=”com.facebook.sdk.ApplicationId” android:value=”@string/facebook_app_id”>
activity android:name=”com.facebook.FacebookActivity” android:configChanges= “keyboard|keyboardHidden”/>
•Android Facebook Integration Code
layout file
>
<?xml version=”1.0″ encoding=”utf-8″?>
<LinearLayout
xmlns:android=”http://schemas.android.com/apk/res/android”
xmlns:app=”http://schemas.android.com/apk/res-auto”
xmlns:tools=”http://schemas.android.com/tools”
android:layout_width=”match_parent”
android:layout_height=”match_parent”
android:background=”#222″ android:gravity=”center”
android:orientation=”vertical”>
<ImageView android:id=”@+id/imageView”
android:src=”@mipmap/ic_launcher”
android:layout_width=”100dp”android:layout_height=”100dp” />
<TextView android:id=”@+id/txtUsername”
android:layout_width=”wrap_content”
android:layout_height=”wrap_content” android:text=”Username”
android:padding=”8dp” android:textColor=”#FFF” /> <TextView
android:id=”@+id/txtEmail”
android:layout_width=”wrap_content”
android:layout_height=”wrap_content” android:text=”Email
Address” android:padding=”8dp” android:textColor=”#FFF” />
<com.facebook.login.widget.LoginButton
android:id=”@+id/login_button”
android:layout_width=”wrap_content”
android:layout_height=”wrap_content”
android:paddingBottom=”15dp” android:paddingTop=”15dp”
app:layout_constraintBottom_toBottomOf=”parent”
app:layout_constraintLeft_toLeftOf=”parent”
app:layout_constraintRight_toRightOf=”parent”
app:layout_constraintTop_toTopOf=”parent” />
</LinearLayout>
• MainActivity.java:
The main class file that handles all request and monitors the corresponding response.
public class MainActivity extends AppCompatActivity {
LoginButton loginButton;
CallbackManager callbackManager;
ImageView imageView;
TextView txtUsername, txtEmail;
@Override
protected void onCreate(Bundle savedInstanceState) {
super.onCreate(savedInstanceState);
setContentView(R.layout.activity_main);
loginButton = findViewById(R.id.login_button);
imageView = findViewById(R.id.imageView);
txtUsername = findViewById(R.id.txtUsername);
txtEmail = findViewById(R.id.txtEmail);
boolean loggedOut = AccessToken.getCurrentAccessToken() == null;
if (!loggedOut) {
Picasso.with(this).load(Profile.getCurrentProfile().getProfilePictureUri(200, 200)).into(imageView);
Log.d(“TAG”, “Username is: ” + Profile.getCurrentProfile().getName());
//Using Graph API
getUserProfile(AccessToken.getCurrentAccessToken());
}
loginButton.setReadPermissions(Arrays.asList(“email”, “public_profile”));
callbackManager = CallbackManager.Factory.create();
loginButton.registerCallback(callbackManager, new FacebookCallback() {
@Override
public void onSuccess(LoginResult loginResult) {
// App code
//loginResult.getAccessToken();
//loginResult.getRecentlyDeniedPermissions()
//loginResult.getRecentlyGrantedPermissions()
boolean loggedIn = AccessToken.getCurrentAccessToken() == null;
Log.d(“API123″, loggedIn + ” ??”);
}
@Override
public void onCancel() {
// App code
}
@Override
public void onError(FacebookException exception) {
// App code
}
});
}
@Override
protected void onActivityResult(int requestCode, int resultCode, Intent data) {
callbackManager.onActivityResult(requestCode, resultCode, data);
super.onActivityResult(requestCode, resultCode, data);
}
private void getUserProfile(AccessToken currentAccessToken) {
GraphRequest request = GraphRequest.newMeRequest(
currentAccessToken, new GraphRequest.GraphJSONObjectCallback() {
@Override
public void onCompleted(JSONObject object, GraphResponse response) {
Log.d(“TAG”, object.toString());
try {
String first_name = object.getString(“first_name”);
String last_name = object.getString(“last_name”);
String email = object.getString(“email”);
String id = object.getString(“id”);
String image_url = “https://graph.facebook.com/” + id + “/picture?type=normal”;
txtUsername.setText(“First Name: ” + first_name + “\nLast Name: ” + last_name);
txtEmail.setText(email);
Picasso.with(MainActivity.this).load(image_url).into(imageView);
} catch (JSONException e) {
e.printStackTrace();
}
}
});
Bundle parameters = new Bundle();
parameters.putString(“fields”, “first_name,last_name,email,id”);
request.setParameters(parameters);
request.executeAsync();}
}
All set. Build your project and see if the feature is effectively working or not. Of course, it will.
And you are done with adding the Facebook login option in your app. Just a few additions, a run through and you are ready with your app featuring a Facebook login option. Inducing the above, we have helped clients boost their app registration count in a year.
If you are looking for something similar, reach out to us. We, at Coruscate, help business firms add this feature and leverage their app traffic with Android app development. A name in the app development world, we integrate solutions that help professionals drive the best out of their app.[/vc_column_text][/vc_column][/vc_row]


